Contents
Index
Lot Numbers - Annotated Plan
The Lot Numbers tab is used to display set the font, colour and style of the lot number text to be generated for lots.
To compute the annotated plot, follow these steps:
1. Turn on or off any required options for Lots, areas, bearings, distances etc
2. Press APPLY or OK to generate the annotated text.
Lot Numbers
This check box allows the user to turn on or off the Lot Numbers.
Note that the Lot number and Area text is generated and inserted into the job just like any other piece of text. It can then be edited and altered at will.
This can also be controlled from the ‘Annotated Plot’ tab.
Note: When the lot number is altered on the string definition, the lot number text will be updated with the new lot number/name. When a lot definition is changed, the area is recomputed and the area text will be updated.
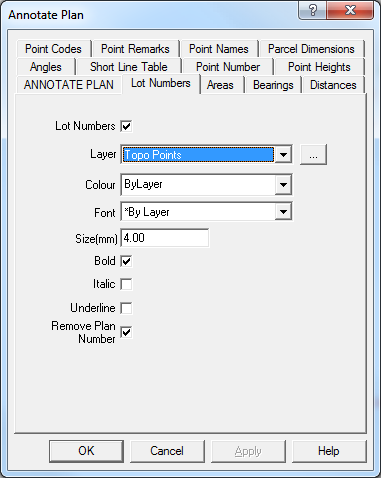
Layer
Select the target layer on which the Lot Number text will be placed. Press the [...] button to create a new layer.
Note that the Lot number text may be generated using the font, text size and colour of the layer it is placed on. This allows you to easily change the size, font or colour of all the lot number text by directly changing the layer attributes.
Colour
Select the colour of the lot number text, select ‘*ByLayer’ if you want the lot number text to use the same colour as the layer text.
Font
Select the font of the lot number text, select ‘*ByLayer’ if you want the lot number text to use the same font as the layer text.
Size
Select the text size in mm for the lot number text, leave this field blank if you want the lot number text to use the same text size as the layer text.
Bold
Tick the bock if you want Bold text.
Italic
Tick the box if you want Italic text.
Underline
Tick the box if you want Underlined text.
Remove Plan Number
Tick the box to remove any plan numbers, some lots may have the plan number appended to the lot number. e.g. ‘123/715243’ will be converted to ‘123’.